



Your next sale is nearly ready. The discounts work, the checkout is live, and your abandoned-cart texts are written. Then your SMS provider asks for brand registration, campaign details, and evidence of consent before you can send to US shoppers.
10DLC registration belongs on your launch checklist, not your launch-day to-do list. The fee matters, but a mismatched business name, unclear campaign description, or missing checkout screenshot can create a bigger problem: an approved offer with no approved way to text it.
Treat registration like a release. Give it an owner, prepare the evidence, leave room for review, and don’t switch on messaging until the live setup matches what carriers approved.
Table of Contents
- Do You Need 10DLC Registration and Which Route Fits
- Information to Gather Before You Submit
- How to Submit Brand and Campaign Step by Step
- What Registration Costs and How to Budget for It
- Approval Timelines, Rejections and Sending Limits
- Go-Live Timeline Before Your Next Sale
Do You Need 10DLC Registration and Which Route Fits
Yes, if your store sends automated texts to US shoppers from a standard local 10-digit long-code number, you need 10DLC registration. That includes abandoned-cart reminders, promotional offers, and order notifications sent through software.
10DLC means a standard 10-digit long-code number used for application-to-person messaging, or A2P. The Hatch guide to 10DLC explains the carrier-governed framework: businesses register their brand, which identifies the sender, and their campaign, which identifies the messaging purpose, through The Campaign Registry.
This isn’t ordinary person-to-person texting just because the number looks local. Registration affects whether carriers accept your business traffic, not whether you’ve completed an administrative form.
Start with a short audit:
- Inventory your messages: Include recovery reminders, discount offers, shipping updates, and software-triggered support texts.
- Identify the sender: Record the number and platform used for each message.
- Separate destinations: Distinguish US-bound messaging from international traffic.
- Check eligibility: Establish whether your business has an EIN before choosing a registration route.
Review the route with the person responsible for your checkout and customer communications.

Registration routes and sending ceilings
The Twilio registration comparison distinguishes Sole Proprietor, Low Volume Standard, and Standard routes, including published T-Mobile ceilings of 1,000 messages per day for Sole Proprietors and 2,000 per day for Low Volume Standard.
| Registration Type | Who It Suits | Daily Ceiling | Scaling Constraint |
|---|---|---|---|
| Sole Proprietor | Individuals without an EIN and small test sends, subject to eligibility | 1,000 messages per day, published T-Mobile ceiling | Different eligibility and fees; hard to scale |
| Low Volume Standard | Small stores with an EIN and modest automated volume | 2,000 messages per day, published T-Mobile ceiling | Low-volume tier; reassess as cart recovery grows |
| Standard | Growing stores with an EIN and rising daily volume | Based on trust score; unconfirmed until vetting is complete | Requires vetting for capacity planning; prepare early for peaks |
Small test sends aren’t an eligibility category by themselves. A business with an EIN shouldn’t choose Sole Proprietor just because it expects little traffic. Confirm current eligibility, limits, and fees before submitting.
Track billable message segments as well as customer-facing messages, and reassess your route before seasonal peaks or additional stores increase demand. Don’t assume a carrier-specific ceiling describes your global sending capacity.
If you’re comparing sender types, use the CartBoss short-code registration guide before committing to a local-number setup. For the broader customer-data obligations surrounding SMS, the privacy compliance insights from Freeform Company offer useful context alongside carrier registration.
Information to Gather Before You Submit
Build a single registration document before opening the submission portal. Keep business identity fields separate from campaign evidence so your finance, marketing, and development teams can check the parts they own.
Registration fields by layer
Use this checklist in roughly the order you’ll encounter the fields.
| Field | Layer | What to Provide | Common Snag |
|---|---|---|---|
| Legal business name | Brand | Exact name appearing in tax or business records | Trade name or abbreviation that doesn’t match |
| EIN or tax ID | Brand | Federal EIN for Standard registration; eligible sole proprietors use their designated route | Choosing the wrong route without an EIN |
| Business address | Brand | Registered address matching tax records | P.O. box supplied where a physical address is requested, or inconsistent records |
| Website | Brand | Live site showing the business name and contact details | Placeholder or login-only page |
| Contact name, email and phone | Brand | Authorized person who can answer review questions | Unreachable contact |
| Industry category | Brand | Closest accurate category from the provider’s list | Vague or mismatched category |
| Use case | Campaign | Separate entries for cart recovery, promotions, and order notifications | Mixing purposes under a narrow description |
| Sample messages | Campaign | Two or three real messages with the brand name | Samples don’t match the declared purpose |
| Opt-in method and proof | Campaign | Checkout checkbox wording, screenshots, or URLs | Pre-ticked box or missing evidence |
| Opt-out and HELP language | Campaign | Written STOP and HELP responses | Missing HELP text |
| Message frequency | Campaign | Realistic typical messages per subscriber per month | Blank field or unsupported estimate |
The sample count above is a practical preparation target, not a universal portal requirement. Supply whatever your submission form requests.
Fix identity and consent gaps first
Start with the legal name and tax ID. Don’t copy the storefront logo text into the legal-name field unless it matches your business records. Where your trading name differs, make the relationship understandable on your website rather than leaving a reviewer to infer it.
A sole proprietor may qualify without an EIN, but still needs accurate identity and contact details. That route isn’t permission to submit incomplete information.
For campaign preparation, make a separate entry for each distinct messaging purpose. A cart reminder, a general sale announcement, and an order update need descriptions that explain their respective triggers and audiences.
Submission habit: Keep the field document beside a folder containing checkout screenshots, policy links, and the exact consent wording customers see.
Read the CartBoss guide to expressed written consent while reviewing the form. A phone-number field tells you where someone can be reached; it doesn’t, by itself, explain what they agreed to receive.
How to Submit Brand and Campaign Step by Step
Submit through your messaging provider’s registration workflow. Your job is to make the business identity, customer journey, and actual messages consistent enough that a reviewer can understand the program without guessing.
The process overview below shows the main approval stages.
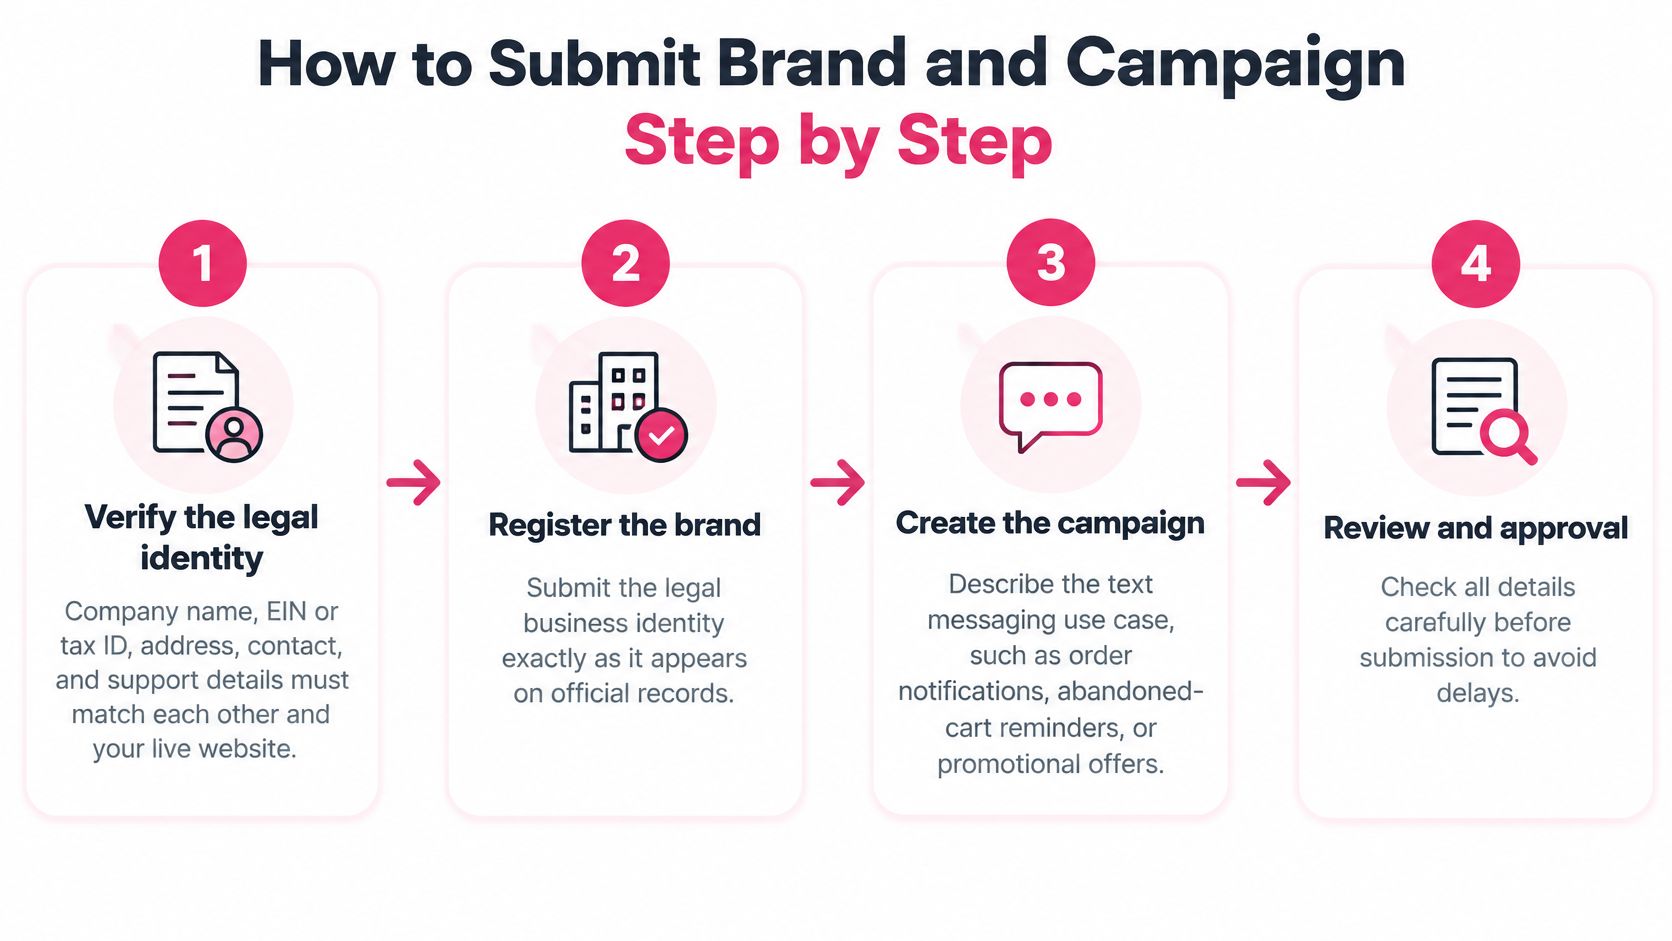
Complete the submission in order
-
Verify the legal identity. Compare the company name, EIN or tax ID, address, authorized contact, and support details against your official records and live website. Fix inconsistencies before submitting rather than explaining them after a rejection.
-
Register the brand. Enter the legal identity exactly as recorded and wait for the result before proceeding with campaign creation. Don’t treat a saved draft or payment receipt as approval.
-
Create a campaign for each distinct use case. Describe abandoned-cart recovery separately from promotional blasts and order notifications. The common slip is submitting a narrow recovery description while planning a broader marketing program.
-
Document the customer journey. Show how a shopper reaches the checkout, enters a phone number, and actively agrees to the relevant texts. Save screenshots or accessible URLs for the checkbox, privacy policy, terms, and any confirmation flow, not just a statement that customers opt in online.
-
Write the operational language. Provide the opt-in confirmation, STOP response, HELP response, and realistic frequency disclosure. Match the live consent screen, and replace a pre-ticked checkbox with an active choice before capturing your evidence.
-
Submit representative message samples. Include recognizable brand identification and STOP and HELP mechanisms in messages that reflect the registered purpose. Don’t submit polished placeholders that bear little resemblance to the automation you’re about to enable.
-
Associate sending numbers after campaign approval. Verify the approved campaign in your provider’s system before attaching the relevant numbers. Trying to finish number assignment before approval doesn’t remove the review dependency.
The SignalWire registration workflow documents this campaign-level approach and says standard reviews can take up to five business days. Start before a sale, not while shoppers are already abandoning their carts.
Make the description concrete
A useful abandoned-cart description identifies the audience, trigger, consent location, and exit mechanism. For example:
Our store sends cart-recovery reminders to shoppers who actively opt in at checkout. Messages relate to their incomplete purchase, identify our brand, and provide STOP and HELP instructions.
Adapt that wording to your real checkout and automation. If recovery messages include discounts, disclose that content rather than submitting reminder-only samples and introducing offers after approval.
For a visual walkthrough, watch the registration process before completing your final review.
Use the CartBoss SMS campaign marketing guide to check the connection between your campaign purpose and message content. Before submitting, open the live checkout in a private browser window: every sample should be something you send, and every consent screenshot should match what a shopper sees.
What Registration Costs and How to Budget for It
| Fee | Typical Amount | When It Applies | Budget Note |
|---|---|---|---|
| Standard brand registration | $44 one-time on the SignalWire schedule; $4.50 for brand registration in the Telnyx compliance guide | At brand registration | These aren’t guaranteed equivalent packages; confirm the exact charge |
| Low-volume or sole-proprietor brand registration | $4 one-time on some schedules | At brand registration | Only if your route qualifies |
| Campaign vetting | $15 one-time | At submission or approval, according to provider | Rejection can require a paid resubmission |
| Campaign recurring fee | $1.50 to $10 per month | Monthly for each campaign | Check category and provider pricing |
| Carrier message fees | $0.0025 per SMS and $0.005 per MMS, early Verizon rates | Per message sent | Historical illustration, not a current quote |
The remaining published fee examples in the table come from SignalWire’s schedule; Telnyx also documents campaign-verification charges and the possibility of paid resubmission. Budget using the higher standard-brand example until your provider confirms the applicable price, rather than assuming the lowest advertised fee covers your setup.
Budget for traffic, not just approval
For a store sending thousands of cart-recovery texts each month, the registration payment is only the starting expense. Recurring campaign charges, provider messaging costs, carrier pass-through charges, and message segmentation belong in the same forecast.
The SignalWire documentation also states that US-bound SMS and MMS from unregistered +1 10DLC numbers became subject to complete blocking beginning September 1, 2023. Skipping registration therefore isn’t a useful cost-saving strategy.
Keep these budget lines separate:
- Setup: Brand registration and campaign vetting.
- Recurring: Monthly fees for active campaigns.
- Traffic: Messaging charges and current carrier rates.
- Contingency: A reserve for a paid resubmission.
Use the CartBoss SMS marketing costs guide when building the full sending budget. If you also operate food-service businesses, Purple Engage lets you compare text campaign pricing for eateries, a useful adjacent example of separating messaging costs from consent work.
Approval Timelines, Rejections and Sending Limits
Approval isn’t the finish line. Your team still needs to keep live content aligned with the approved purpose, stay within assigned capacity, and review changes before expanding the program.
The Intercom US local 10DLC registration guide describes carrier review taking five to seven business days, with the review potentially restarting after resubmission. Repeated corrections can turn a manageable review into a launch delay lasting weeks.
Fix the cause before resubmitting
Don’t respond to rejection by changing a few adjectives and pressing submit again. Compare the review feedback with the entire customer journey.
| Rejection trigger | Practical correction |
|---|---|
| Vague or mixed-purpose description | Name the audience, trigger, and content; separate a genuinely new purpose |
| Samples don’t match the use case | Replace them with representative messages from the actual automation |
| Missing or pre-ticked consent evidence | Fix the live opt-in flow and capture fresh evidence |
Edit an existing submission when you’re correcting how the same use case is documented. When you add a materially different message type, such as general promotional broadcasts to a cart-recovery program, prepare the appropriate new campaign rather than stretching the old description.
A cheaper registration route isn’t cheaper if your team discovers its limitations during the sale you needed it to support.
That trade-off matters around Black Friday. Lost recovery opportunities can outweigh the registration fee, even though no provider can promise what revenue an approved campaign will generate.
Plan capacity at campaign level
Adding more numbers doesn’t automatically increase your sending allowance. Numbers attached to the same campaign share its send-rate limit, so capacity planning needs to start with the approved campaign, not the number inventory.
The Telnyx explanation of 10DLC throughput gives an AT&T standard-campaign example of approximately 240 messages per minute for low or unvetted scores, 2,400 for scores of 50 to 74, and 4,500 for scores of 75 to 100. These are carrier- and campaign-dependent planning benchmarks, not guaranteed delivery rates.
External vetting may improve the eligible tier, but it doesn’t replace campaign approval or valid consent. Registration also doesn’t guarantee that every message will reach every recipient.
Build a fallback before the launch:
- Queue sends: Respect the assigned rate instead of attempting an uncontrolled burst.
- Preserve relevance: Don’t release stale cart reminders because they finally leave the queue.
- Prepare alternatives: Keep a consented email or on-site offer ready if SMS approval slips.
- Control changes: Review new templates and triggers against the approved scope before publishing.
Use the CartBoss SMS compliance checklist as a release check, not an approval certificate.
Go-Live Timeline Before Your Next Sale
Work backward from the sale date and assign a named owner to registration. The schedule below is a suggested planning buffer, not a carrier service commitment or a promise that every submission will finish in time.
Three weeks before the sale
Submit the brand, then move each distinct use case through campaign registration when the workflow permits. Freeze a dated copy of your consent screen, message samples, privacy policy, and terms so everyone knows which version you’re submitting.
Keep a simple launch tracker with these fields:
- Owner: Person responsible for responding to review questions.
- Status: Draft, submitted, changes requested, or approved.
- Dependency: Identity verification, campaign review, or number association.
- Evidence: Location of the matching consent and message files.
- Fallback: What marketing will do if approval isn’t ready.
This makes an unresolved registration visible before the campaign calendar fills up.
Two weeks before the sale
Check review messages and keep the authorized contact reachable. If the campaign is rejected, correct the cited issue in both the submission and the live customer journey before resubmitting.
Don’t allow unrelated checkout edits to invalidate your evidence. Ask whoever manages Shopify or WooCommerce to flag changes to the phone field, consent checkbox, policy text, and recovery automation.
At CartBoss, each customer is the data controller responsible for processing its end users’ data and obtaining prior legal consent before sending end user messages. Carrier approval doesn’t transfer that responsibility to us.
One week before the sale
Confirm the brand and campaign statuses, complete number association, and run a controlled test on a team phone. Compare the received text with the approved samples, then test the checkout destination and the STOP and HELP responses.
Keep the evidence folder accessible after launch. A successful test confirms your configuration works for that test; it doesn’t prove universal deliverability.
For message content, use the abandoned-cart text messages guide. For scheduling decisions, review when to send abandoned-cart text messages before enabling the recovery sequence.
Your action this week: Open your message inventory, mark each automated text and its purpose, and submit brand registration under the route matching your EIN status and eligibility. If you need to contact us about your setup, Cart DATA ltd. can be reached through the messaging application on the CartBoss website.
CartBoss offers automated SMS cart recovery for e-commerce stores, helping you reconnect with shoppers who leave checkout unfinished. Visit CartBoss to explore the recovery workflow and prepare your messaging setup alongside your registration, consent evidence, and launch checks.
